Zero to Hero

Those of you who read my last blog post learned that the images posted on my website, http://www.heckenlively-photo.com typically receive just a rough edit.  Typically it takes 15-20 minutes of extra work in photoshop to take an image from rough edit to polished image.  The photoshop steps vary a bit, but most images go through some or all of these steps.

The first thing I almost always do is noise reduction.  I’m a big fan of the photoshop plugins from Nik Software.  Now that Google has made them available for free, getting them is a no brainer.  Nik’s Dfine is my go to for noise reduction.  When you run any of the Nik plugins on the background layer, they automatically create a new layer with the output from the filter.  In the case of Dfine, that is particularly handy.  As a rule you want full noise reduction on any areas that are out of focus in the image, but you want to reduce the noice reduction on areas with detail.  I use the erase tool with a highly feathered brush and slow flow to partially erase the layer created by Dfine where I want more detail.  When I am finished, I typically merge visible on the background and Dfine layers.  Photoshop purists might suggest making a smart object at this point.  Creating a smart object does provide the flexibility for changing the noise reduction later.  Personally, I find it easier to just merge.

The next adjustment I typically do is color correction.  Here I use a bit of a dirty trick.  Nik’s Color Efex Pro has a preset called White Neutralizer.  I have found that it can be a quick way to eliminate color casts.  The output from Color Efex’s White Neutralizer tends to be a bit blue.  However, I usually get decent results by reducing the visibility of the output layer from Color Efex pro.  Once I get a color balance with which I am happy, I merge the visible layers.  (I know…photoshop heresy…)

Next, I like to add some structure to the image.  A number of the Nik plugins offer the option to add structure.  As far as I can tell, it is basically doing the same thing as the clarity slider in Lightroom.  I usually use Nik’s Viveza to add the structure.  I usually reduce the visibility on this output layer a bit to keep the adjustment from being overly obvious, and I merge visible when I am done.

Some images get burning and dodging next.  The terms burning and dodging refer to techniques I used to use in my darkroom days.  When I used to make prints in the darkroom, I would sometimes create masks from cut up pieces of my test prints to increase or decrease the exposure for various parts of my print.  Dodging reduces the exposure, which makes that area of the print lighter.  Burning increases the exposure, which causes that area of the print to be darker.  In photoshop, I typically create a new layer with gray fill, and with overlay blend mode.  I then paint either black or white onto this layer.  The areas that are painted with white are dodged, and they get lighter.  The areas that are painted with black are burned, and they get darker.  Careful burning and dodging can really make the final image pop.

I typically finish with tweaks in curves and contrast adjustment layers.

When people order prints from my website, these are the sorts of steps I go through before the image goes to the printer.  I also use my Instagram feed as a way to practice these techniques.  Most of the images I post there have gone through some or all of these steps.  Look for more details about how the print order process works on my website, in a future blog post.
Post Selection Workflow

A couple of my previous posts have been devoted to my photo selection process.  What does it take to get a group of images ready for presentation on http://www.heckenlively-photo.com? 

As we have already discussed, I use Adobe Lightroom to keep track of my images.  Lightroom stores the photo information in catalogs.  If you are an IT geek, think database.  In fact, I have read that Lightroom uses SQLite under the covers.  Lightroom supports using multiple catalogs, and the topic of one catalog vs. many is a topic of some debate among photographers on the Net.  Personally, I find it most convenient to keep a master catalog of everything.  This gives me a single place to lookup all images.

I have close to half a million images cataloged in my main catalog, plus the main catalog contains all the collections I have synced with Lightroom Mobile.  This all tends to make Lightroom a bit pokey, so editing images in the master catalog can be a bit slow.  The way I work around this is by saving my selected images into a working catalog.  I open the working catalog in Lightroom, edit the images, and then I re-import the images from the working catalog back into the main catalog.

This next part might come as a surprise for some of you.  The images posted on http://www.heckenlively-photo.com usually only receive a rough edit.  Lightroom has features for editing images as a batch.  Things like color and exposure are usually batch processed.  The only individual edit I usually do is cropping.  It takes a trip through photoshop and about 15-20 minutes of extra work to take an image from rough edit to fully polished gem.  I simply do not have time to do this with every image posted to my site.

(Print sales are an exception to this rule.  I plan on discussing more about how this works in a future blog post.  If you want to help support the site, occasional print sales help offset the ongoing costs for operating the site.)

As mentioned in a previous post, Lightroom has facilities for publishing directly to various social media sites, and I host my photo site on Smugmug.  I use a Lightroom plugin to publish directly to Smugmug.  The Smugmug gallery is just another collection in Lightroom with some additional properties.

Raw vs. JPEG

In my last post I briefly touched on raw photo processing.  What does it mean to shoot raw?  To answer this question, we need discuss the JPEG image format a bit.  (Most professional and semiprofessional level cameras can shoot in both raw and JPEG.)

JPEG is a lossy compressed image format.  For the sake of this discussion, let’s ignore the lossy and compressed aspects for now.  Think of an image as a screen door.  Each hole in the screen represents a piece of the image.  The color information and brightness for each of these pieces is broken down into red, green, and blue channels.  The most commonly used JPEG format uses 8 bits for each channel.  A bit can be either a one or a zero.  The fact that there are 8 bits per channel means that each channel can support 256 possible values.  Each pixel (think hole in the screen door) is represented by three numbers, the red value, the green value, and the blue value.  With 8 bits per channel, JPEG supports 16,777,216 different colors.  This might seem like a lot of colors, but keep in mind that every pixel in an 8 bit JPEG supports only 256 brightness levels of red, 256 brightness levels of green, and 256 brightness levels of blue.  JPEG is the standard image format used by the world wide web, so photographers must publish images in JPEG to share them on the web.

What did I mean by lossy and compressed above?  JPEG is a compressed file format.  Especially in the early days of the world wide web, bandwidth was scarce.  It took a long time to load web sites.  Compressing the information makes file sizes smaller, and web pages load faster.  Compression algorithms are typically lossy or lossless.  Lemped-Ziv is an example of a lossless format.  Roughly speaking, the Lempel-Ziv keeps tracks of blocks of data it has already seen.  When it finds a block it has seen before, it stores a pointer to the previous block instead of the block, which saves space.  By contrast, the JPEG format uses a lossy algorithm.  Roughly speaking, the JPEG algorithm saves space by throwing away information in the photo you probably won’t notice.  When saving an image in JPEG format, tools like Photoshop and Lightroom provide a slider where you can set the amount of compression.

The fact that JPEG is a compressed format, and the limited number of shades of red, green, and blue values per pixel lead many photographers, including me to treat JPEG as an output format only.  For capture, I almost always choose raw.  On Canon cameras, raw images typically end with a .CR2 file extension.  If memory serves, Nikons use .NEF.  The raw file contains all the information from the image sensor with minimal processing.  The number of bits per channel channel varies by camera make and model, but 14 bits per channel is pretty common.  14 bit raw files suppor 16,385 values per channel for a total of 4,398,046,511,104 colors.

Just looking at the numbers, raw files look pretty impressive, but there are few absolutes in photography.  Photographers frequently have to compromise between competing factors.  Raw photographs typically need to be processed by programs like Lightroom or Adobe Camera Raw before they can be shared on the web.  Since raw image files are bigger than JPEGs, it also takes longer for cameras to write them to storage.  The larger size of raw files also means that they take longer to process in tools like like Lightroom and Photoshop.  There are photographers whose work I respect highly who shoot mostly JPEG.  These are mostly sports shooters who work on impossible deadlines.  If this describes your work, JPEG is worth considering.  For my own work, however, I’ll stick with raw for now.

So many pictures…so little time…

As you may have gathered from my last post, I take a lot of pictures.  When school sports are in season, I might shoot between 1000 and 3000 images per week.  In my last blog post I described my two step system for sifting through all the images.  In this post, I’m going to describe more of the technology that makes processing this volume possible.

I keep track of my images in Adobe’s Lightroom product.  Lightroom serves two primary functions.  First, it catalogs the images for retrieval later.  Second, it allows me to perform non destructive edits to the raw images.  (Raw image processing is a topic for a coming blog post.  Stay tuned…)  Lightroom also has handy extensions for publishing to common social media sites.  I use this feature to publish directly from Lightroom to both Instagram and http://www.heckenlively-photo.com.

Unfortunately, sifting through pictures in the desktop version of Lightroom can be tedious.  Lightroom is a great product, but it has some performance problems.  If I am in a huge hurry, I apply my two pass method to the images using a tool called PhotoMechanic, before I import the images into Lightroom.  I have read that if you visit the press room at any NFL game, almost all of the laptops will be running PhotoMechanic.  The big advantage PhotoMechanic has over Lightroom is SPEED.  As I apply my rankings to the images in PhotoMechanic, it writes that information into what are called “side cart” files.  These are small XML files that reside on disk with the image files.  Lightroom automatically recognizes these side cart files, and the image rankings get applied in Lightroom during import.

If I have more time, I now use a relatively new tool in the Adobe suite, Lightroom Mobile.  As the name suggests, it is Lightroom for mobile platforms.  I use use Lightroom Mobile primarily on my iPad, but I have the app installed on my iPhone as well.  Lightroom Mobile requires an Adobe Creative Cloud subscription to function.  There are two ways to move images into Lightroom Mobile.

  1. Import the images into Lightroom Mobile directly on the mobile device.  This works with Raw images too, by the way.
  2. Create a new collection in Lightroom Desktop with the “Synce with Lightroom Mobile” option enabled.

I typically use option 2 when I am going to review a set of images in Lightroom Mobile.  On a fast connection, Lightroom Mobile on my iPad is about as fast as PhotoMechanic on my desktop, and I can work on images “on the go”.  All rankings and edits applied via Lightroom Mobile automatically sync back to Lightroom Desktop via Adobe Creative Cloud, and vice versa.  I typically stick to just ranking my images in Lightroom Mobile, because my iPad does not have a calibrated screen.  The biggest downside to using Lightroom Mobile, is waiting for the images to initially sync into the cloud, which can take hours on a slow Internet connection.

Once I apply my rankings, and select the images for the final gallery, I prepare the images for the gallery in Lightroom Desktop.  

Lightroom Mobile has been a game changer for me.  For years, I took more pictures than I could review and publish.  Now I have a workflow that can keep up.

Not every image is a winner.

I get a lot of positive comments on social media for the images I share on my website and Instagram.  These comments are appreciated.  I work hard to find the best shooting locations, and I try hard to capture memorable moments at the events I photograph.  Having said all this, as the subject of this post suggests, not every photo is a winner, no matter how hard you try.

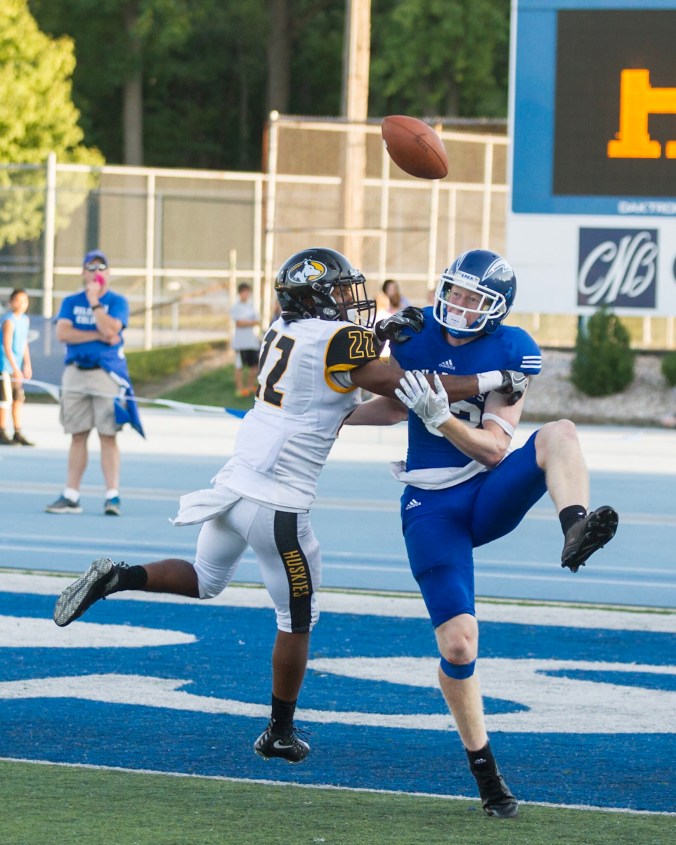
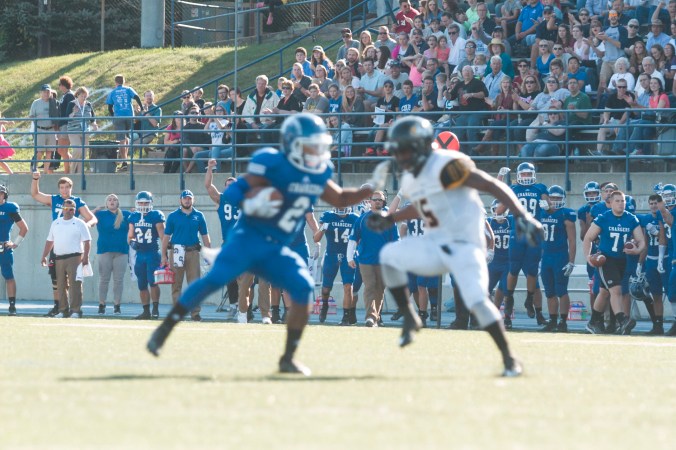
For every image like the one below, I usually cull out another 9 like image that follows


For every hour I spend taking pictures, I typically spend at least another hour reviewing and editing the images from that event.  It is not uncommon to come home with over 1000 images from a football game.  The exact number varies a bit by sport.  Through practice, I have learned that a two step process usually works best for sifting the gold from the dross.  In my first pass, I cull out all the images that are total duds.  Poor focus, bad exposure, and poor composition are all factors that can land a photo in the “dud” pile.  Then I make a second pass, and I select the images for the image gallery from the images that made it through the initial cull.  Frequently half of the images from the event end up in the dud pile.  The final gallery from the event typically only contains 10% of the images taken at the event.

In case you are wondering how I manage to sort through so many images, stay tuned.  I plan on discussing some of the hardware and software I use for that process in a future blog post.

Who is this Patrick Heckenlively Character?

Many people in the greater Hillsdale Michigan community know me primarily as a photographer.  I have been taking pictures seriously since the mid 1980’s.  I purchased my first SLR (no not DSLR) camera in high school with money from my Hillsdale Daily News paper route.  I studied photography while I was a student at Hillsdale College, and I took pictures for the public affairs department of the college as one of several work study jobs.  My senior year, I staged a senior exhibition of my photography through the Art Department.  

Having said all this many might be surprised to learn that I graduated from Hillsdale College with a major in Mathematics and a minor in Physics.  After Hillsale College, I moved to graduate school in Mathematics at University of Nebraska Lincoln.  Upon completing an MS in Applied Mathematics, I took a job at Hillsdale College as the staff photographer.  A year later I switched positions at the college.  The Math department had an unanticipated need for someone to teach for a year while the department looked for a perminant candidate.  My masters degree qualified me for the one year fill in position, even though my lack of a PhD precluded applying for the perminant position.
Following my year in the Math Department, I began studies at St. Vladimir’s Orthodox Theological Seminary in the Masters of Divinity program.  After two years, I took a leave of absence to get married.  Then life kind of intervened.  

Now I had a family to support, so I decided to use my Math background to build a career in the IT (Information Technology) field.  Since virtually all companies require some IT support, changes in industry are common.  I have worked in the book wholesale business, medical billing, military logistics, and now financial services.  At this point, I should probably add the standard disclaimer that I am not a spokesperson of the company for which I work.  All views expressed in this blog are mine alone.

I remain active photographically.  I take occasional side photo jobs, and I shoot numerous events in the Hillsdale Community.  I share these images with the community via my http://www.heckenlively-photo.com site.  My contact information is on my main website, for those who would like to hire me for a photo project.

Introductions and Expectations

Welcome to the innagural post for blog.heckenlively-photo.com.  Since you are reading this, hopefully you are curious what sorts of content might appear here.  To be honest, I’m a little curious myself.  I have some ideas, but as the tag line of my blog suggests, the topics here might vary a bit.  I would like this blog to be offer tips on photography.  I also plan on giving some behind the scenes information about what makes http://www.heckenlively-photo.com tick.  Hopefully some or all of this will be of interest.